Last modified: February 20, 2025
Securing your practitioner account with multi-factor authentication (MFA)
Overview
Protect sensitive information in your Fullscript account by adding multi-factor authentication (MFA) in a few quick steps! You can get peace of mind knowing that your financial, staff, and patient data is protected by an added layer of security.
When you set up multi-factor authentication on Fullscript, you’ll be asked to choose one of two security methods:
- Authenticator app: (recommended) Download an authentication app, such as Google Authenticator, Microsoft Authenticator, LastPass Authenticator, or Twilio Authy Authenticator, to receive login codes.
- SMS: We’ll send a text with an authentication code to the phone number associated with the account.
- Email: We’ll send an authentication code to the email address you use to access your Fullscript account.
Enabling multi-factor authentication: Authenticator app option
You can enable multi-factor authentication and log in with one-time codes from an authenticator app, such as Google Authenticator, Microsoft Authenticator, LastPass Authenticator, or Twilio Authy Authenticator.
To enable multi-factor authentication using an authenticator app:
- Under the Manage heading in the navigation bar, click Settings.
- Click Account.
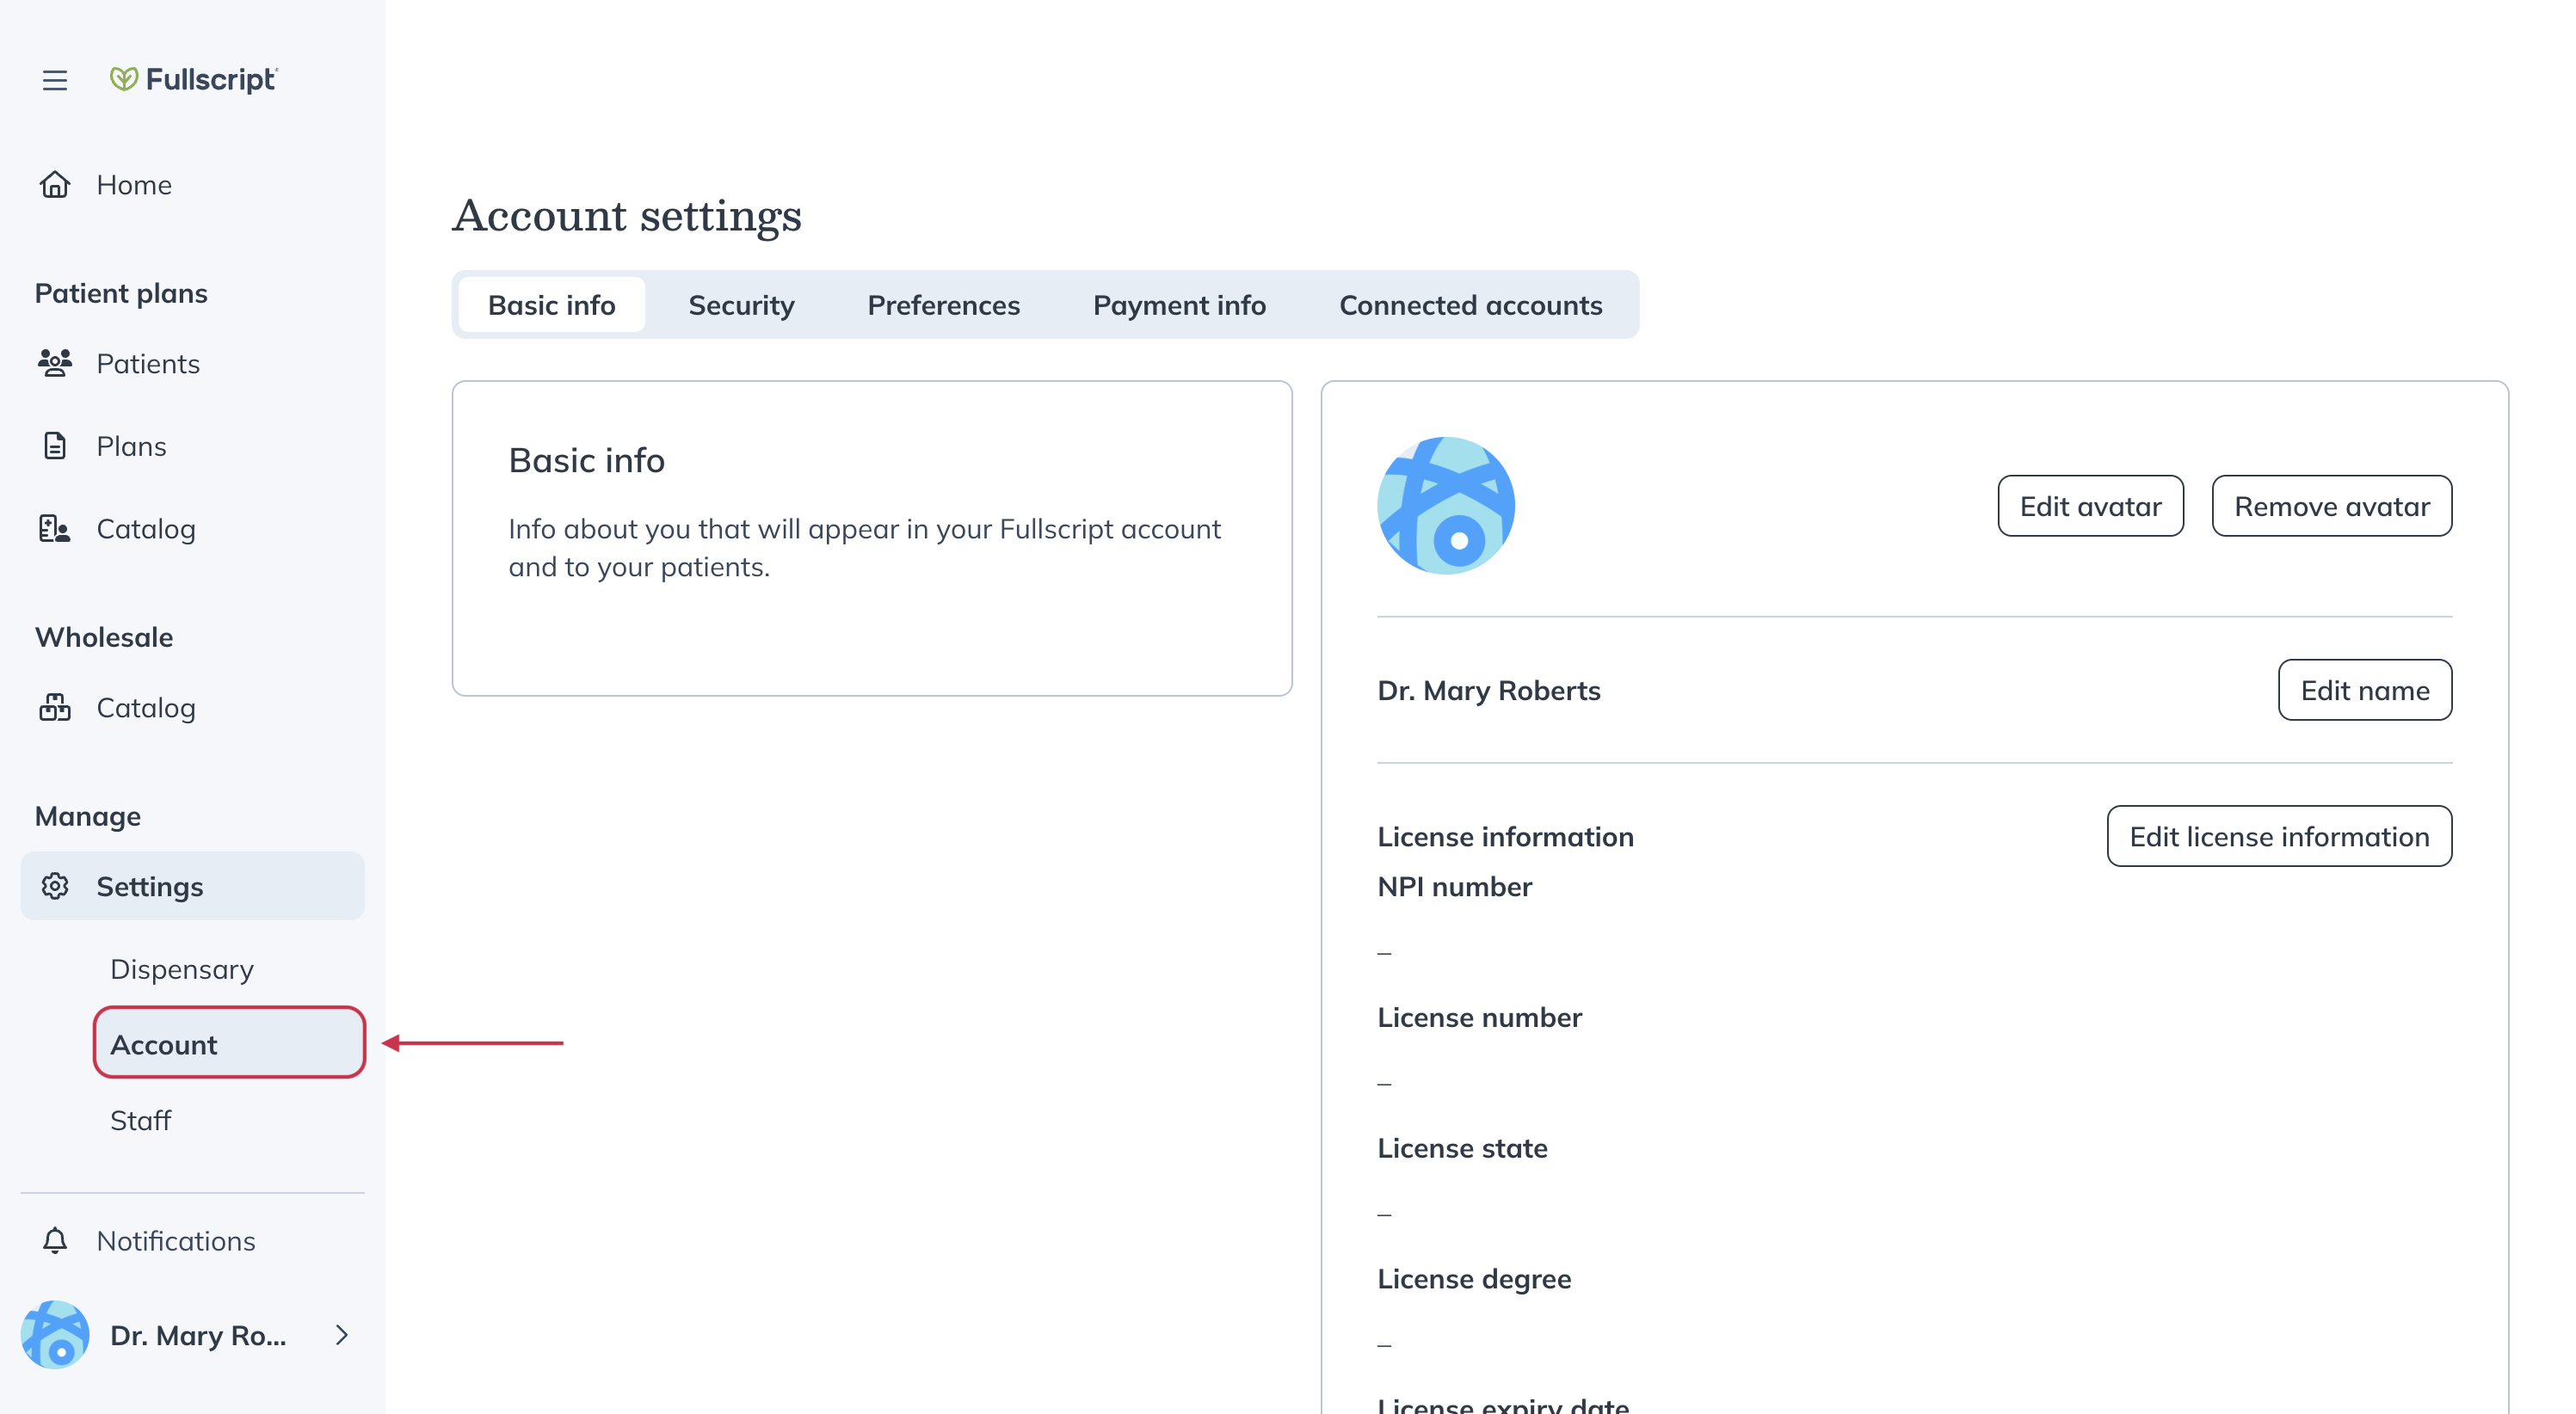
- Select the Security tab.
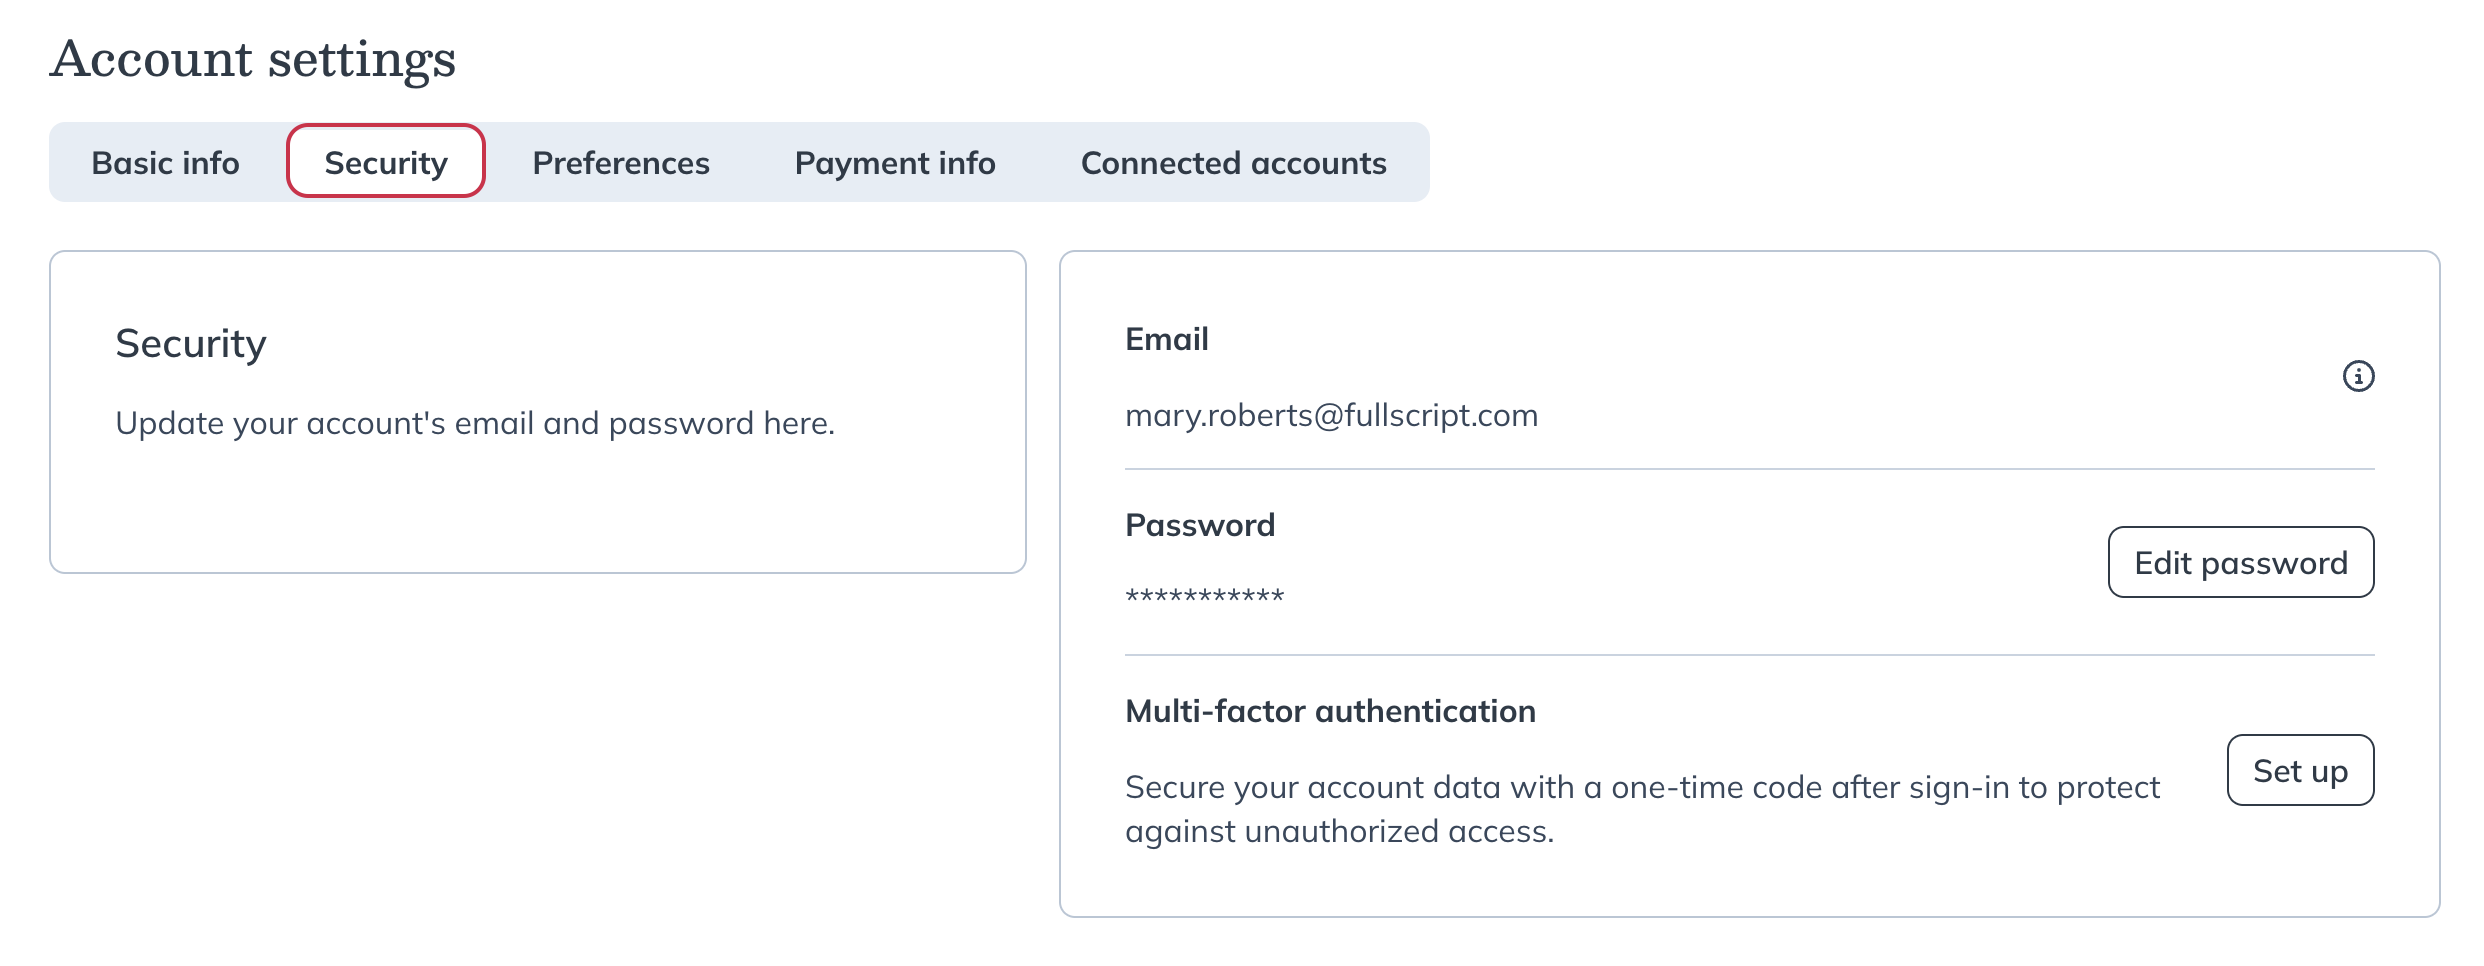
- Under the Login information, find Multi-factor authentication and click Set up.
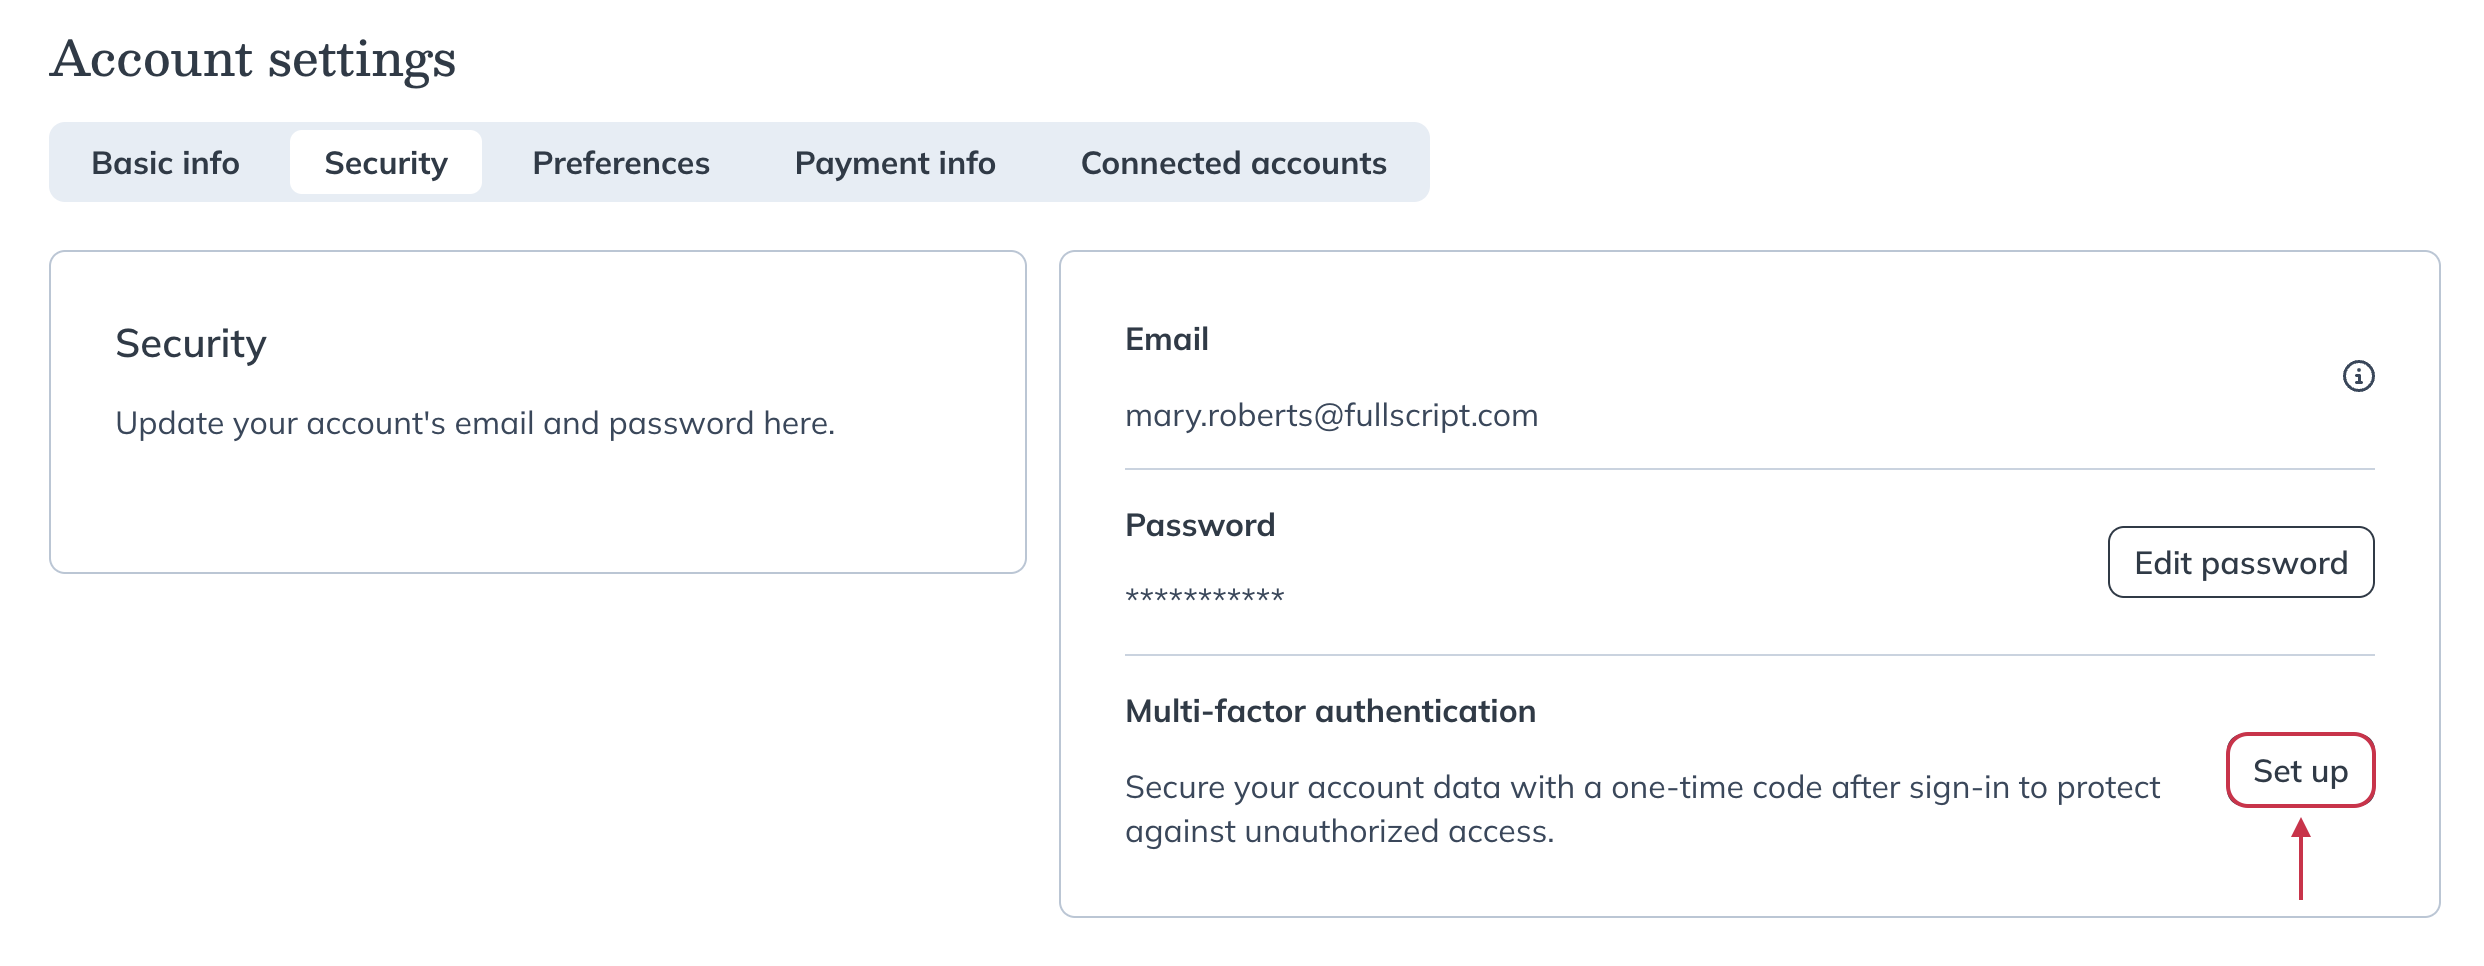
- Select Use an authenticator app, then Next.
- Download or open the authenticator app on your mobile device.
- Click Next on the web app.
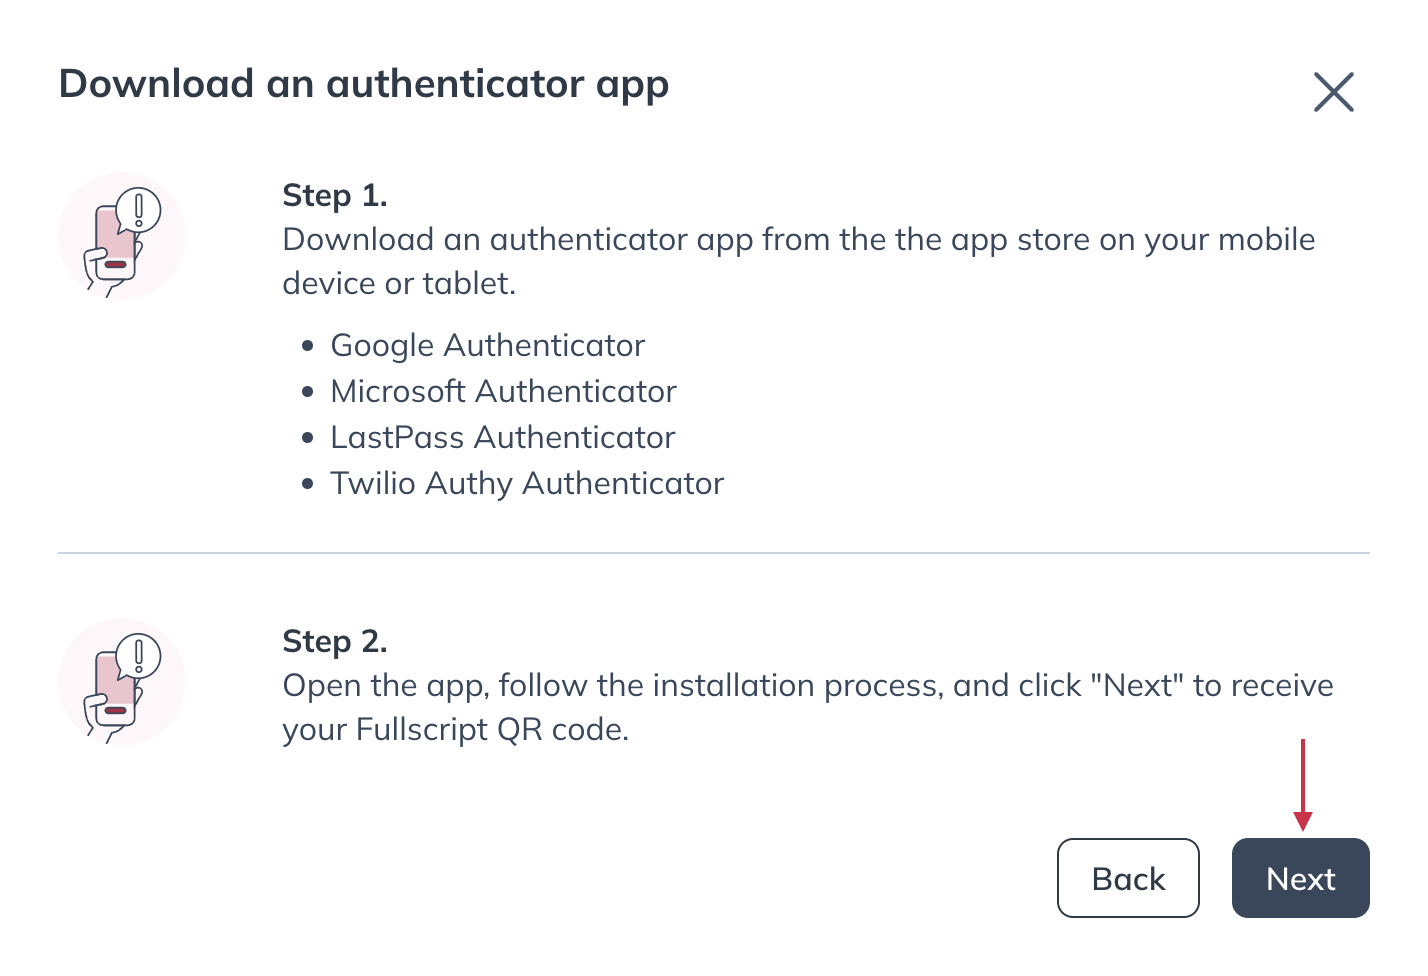
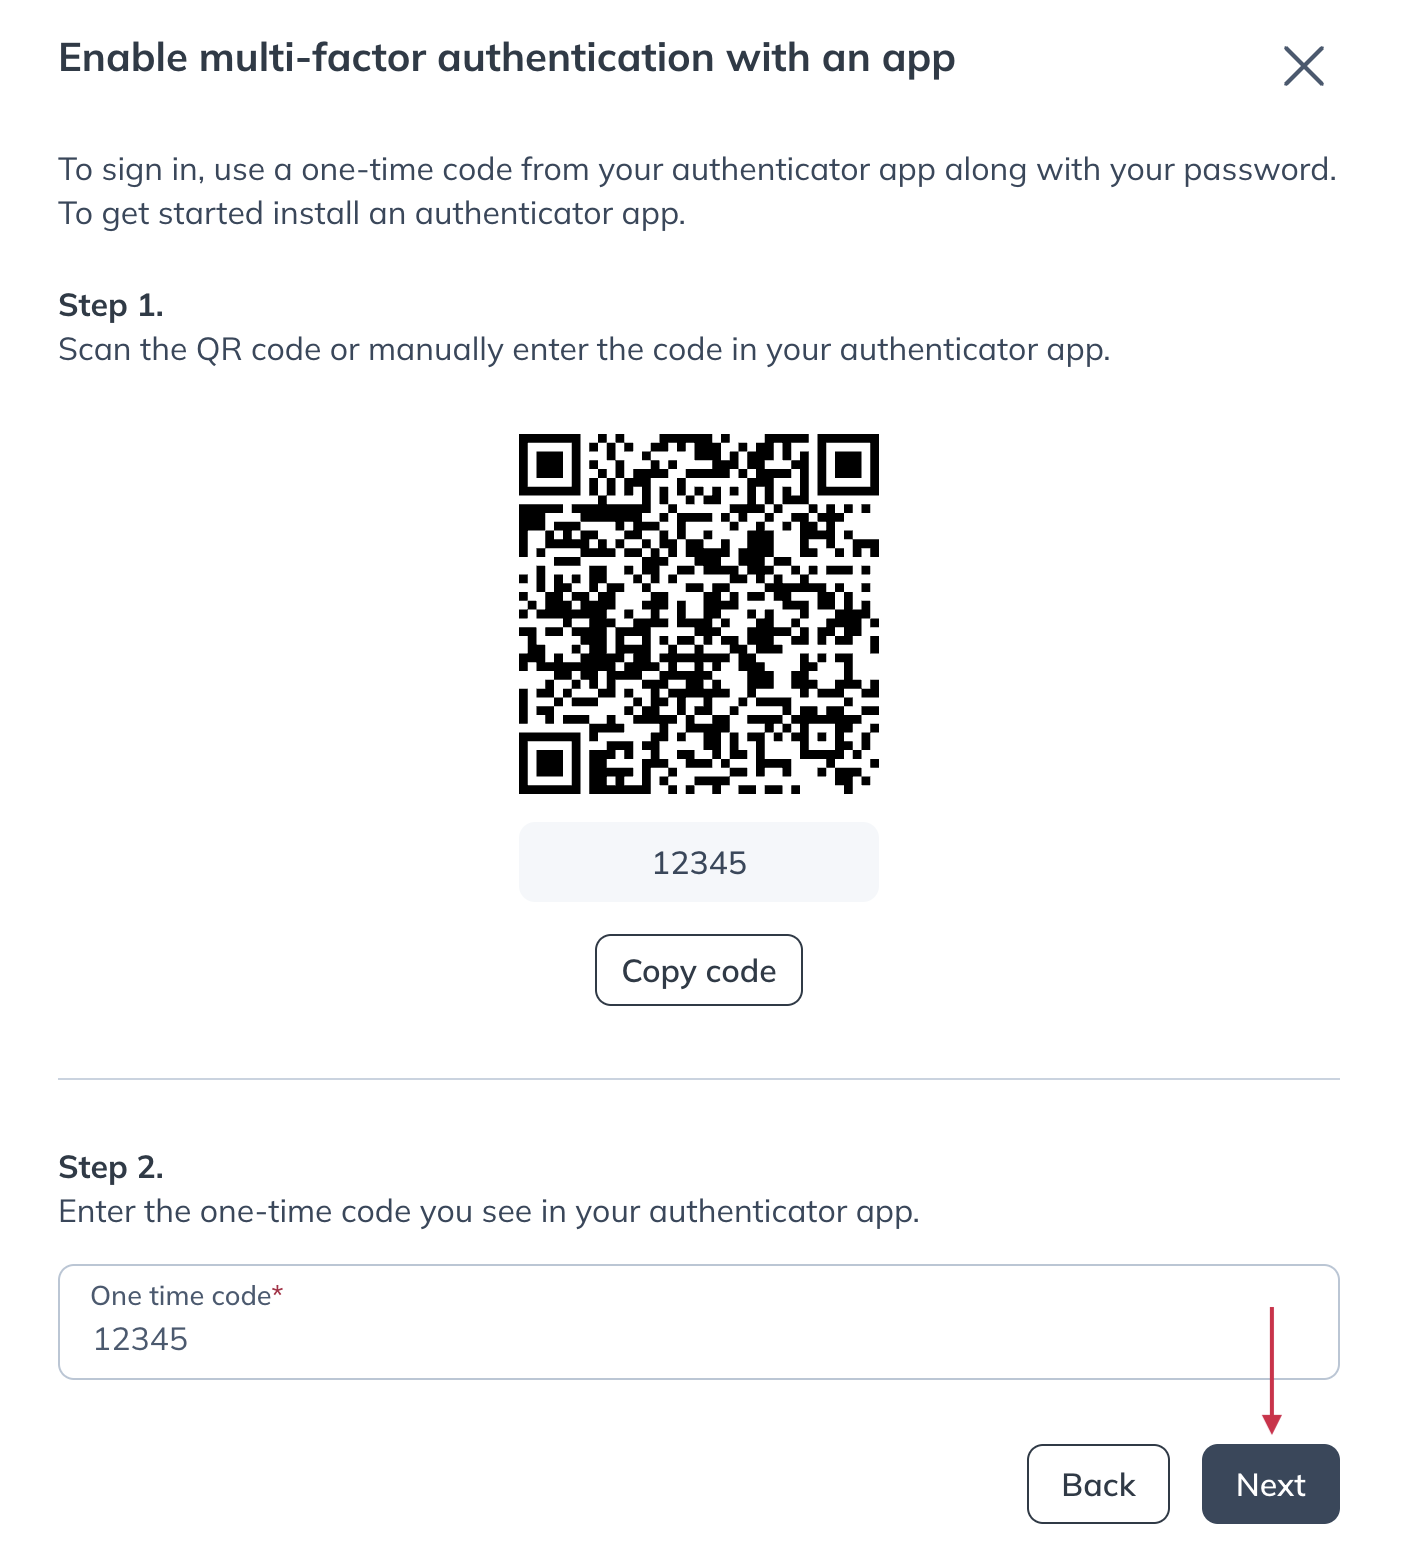
- Using your mobile device, scan the QR code or manually enter the code in your authenticator app.
- Enter the one-time code from your authenticator app and click Next.
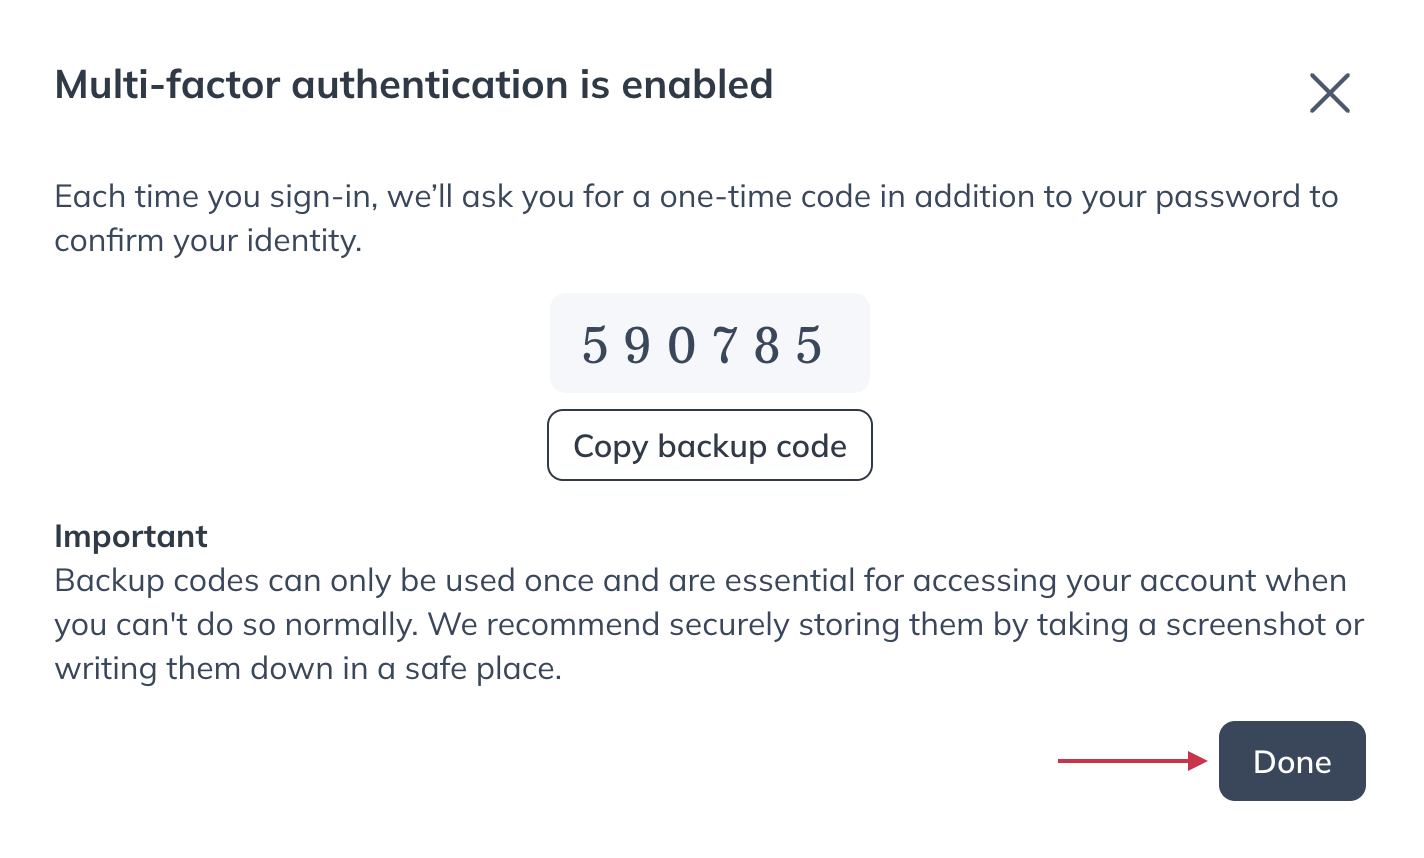
- Copy your backup code or take a screenshot of it and store it in a private folder on your device.
- Then, click Done.
Enabling multi-factor authentication: SMS option
You can enable multi-factor authentication and log in with one-time codes sent to your phone via SMS.
To enable multi-factor authentication using SMS:
- Under the Manage heading in the navigation bar, click Settings.
- Click Account.

- Select the Security tab.

- Under the Login information, find Multi-factor authentication and click Set up.

- Select Use text message and click Next.
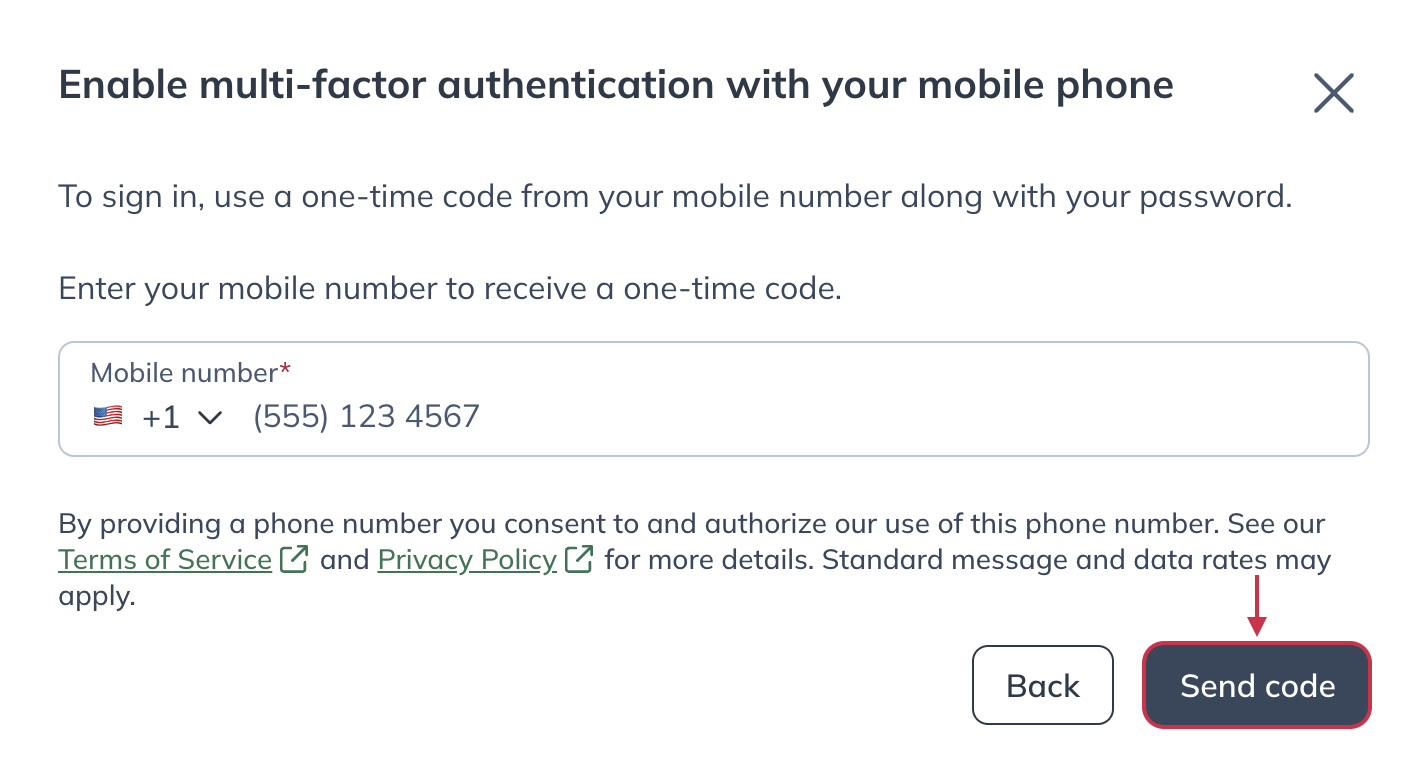
- Enter your mobile number and select Send code to receive a one-time code.
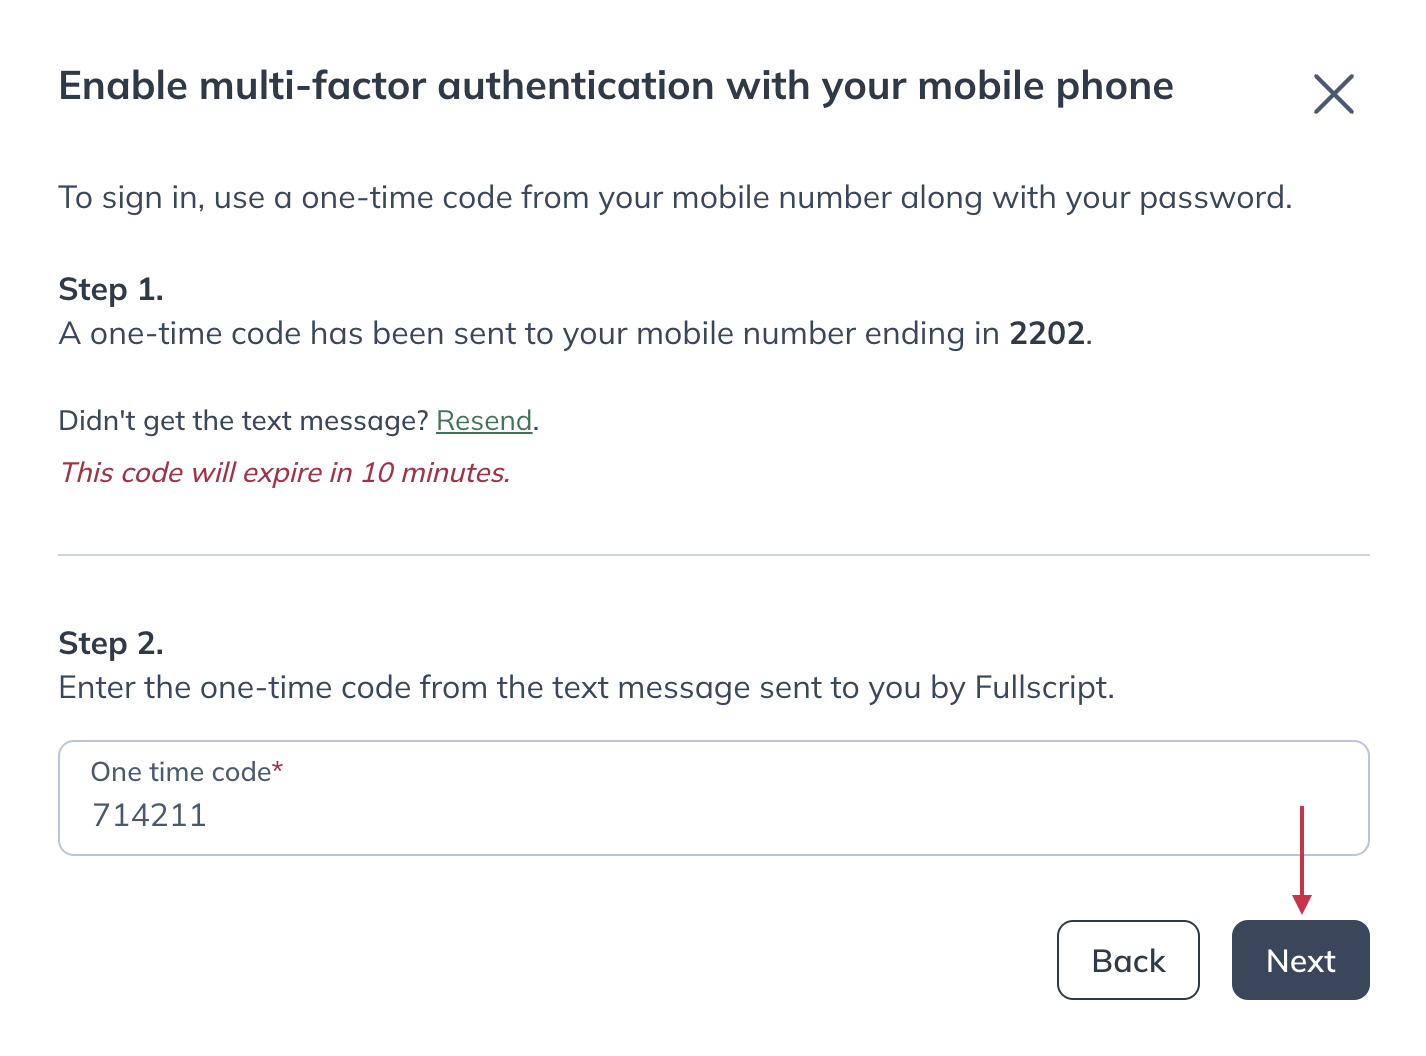
- Enter the code sent to your mobile device and select Next.
- Copy your backup code or take a screenshot of it and store it in a private folder on your device.
Enabling multi-factor authentication: Email option
You can enable multi-factor authentication and log in with one-time codes sent to your email inbox. To enable multi-factor authentication using your login email:
- Under the Manage heading in the navigation bar, click Settings.
- Click Account.

- Select the Security tab.

- Under the Login information, find Multi-factor authentication and click Set up.

- Select Use the email linked to your Fullscript account and click Next.
- You’ll automatically receive an email with a one-time code to you email inbox. Open that email and copy the code.
- Input the code in the one time code field and click Next.

- Copy your backup code or take a screenshot of it and store it in a private folder on your device.
- Click Done.
Logging in with a code
Using a one-time code
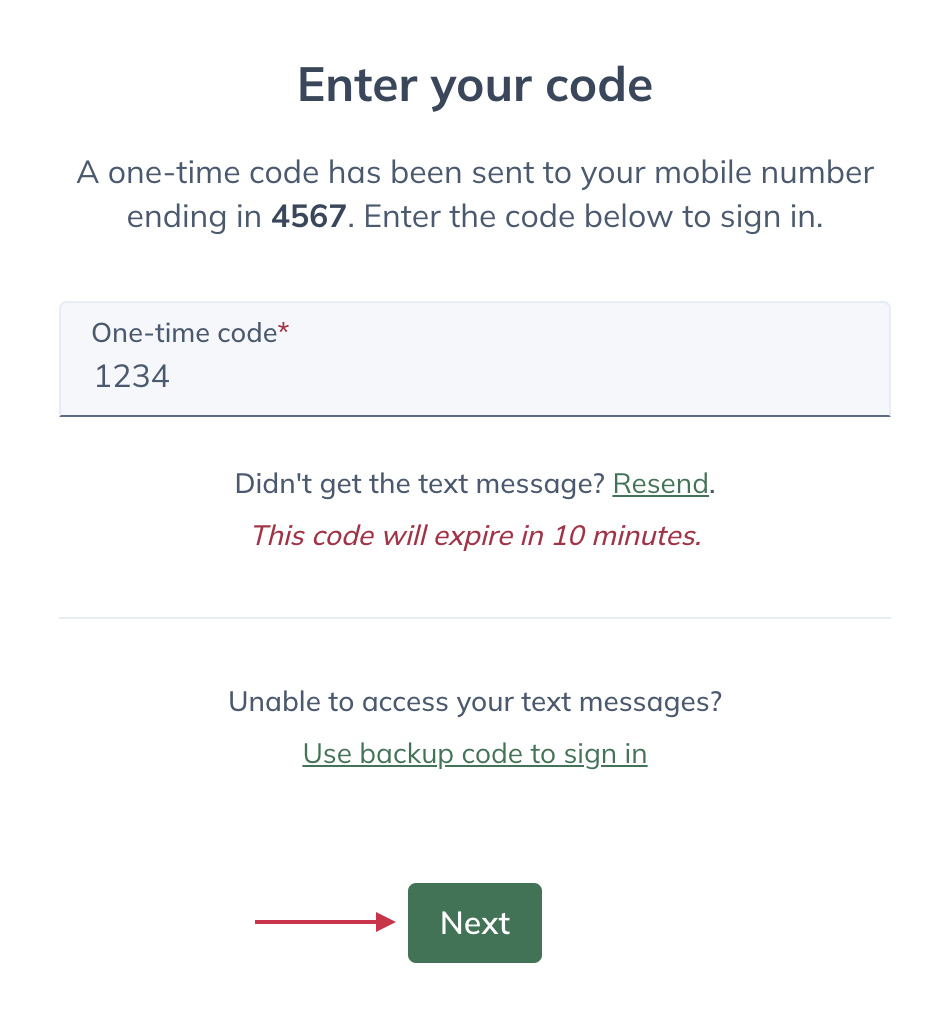
When multi-factor authentication is enabled, we’ll ask you for a one-time code in addition to your password each time you sign in to confirm your identity.
To log in with your one-time code:
- Log into your Fullscript account with your email address and password.
- Enter the one-time code that was sent to your phone or generated from your authenticator app.
- Click Next.
Using a backup code
If you’ve lost access to your multi-factor authentication method, use a backup code to access your account instead. Backup codes are provided during set up, with prompts to copy and store them securely.
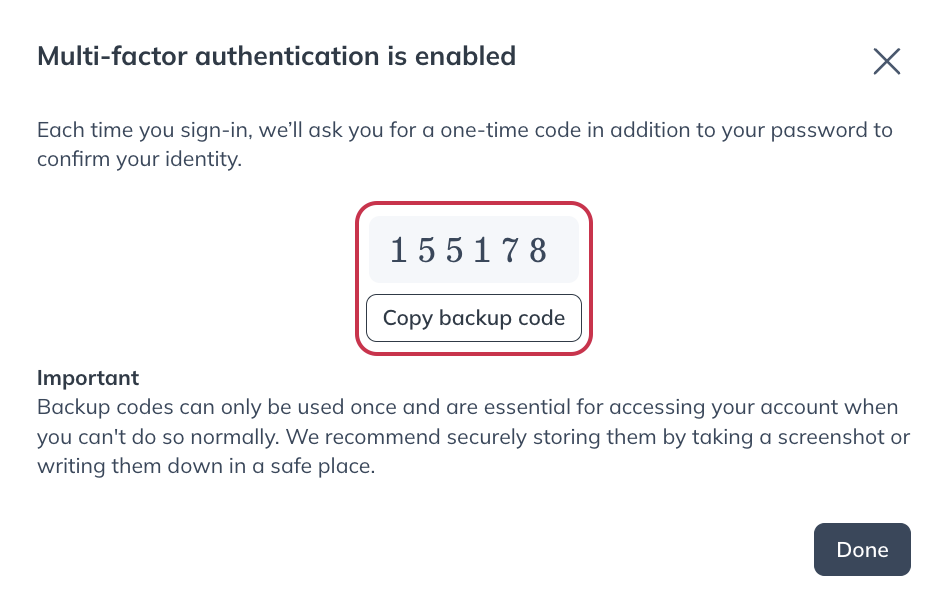
If you’ve saved a backup code:
- Sign in with your email and password.
- When asked for your one-time code, click Use backup code to sign in.
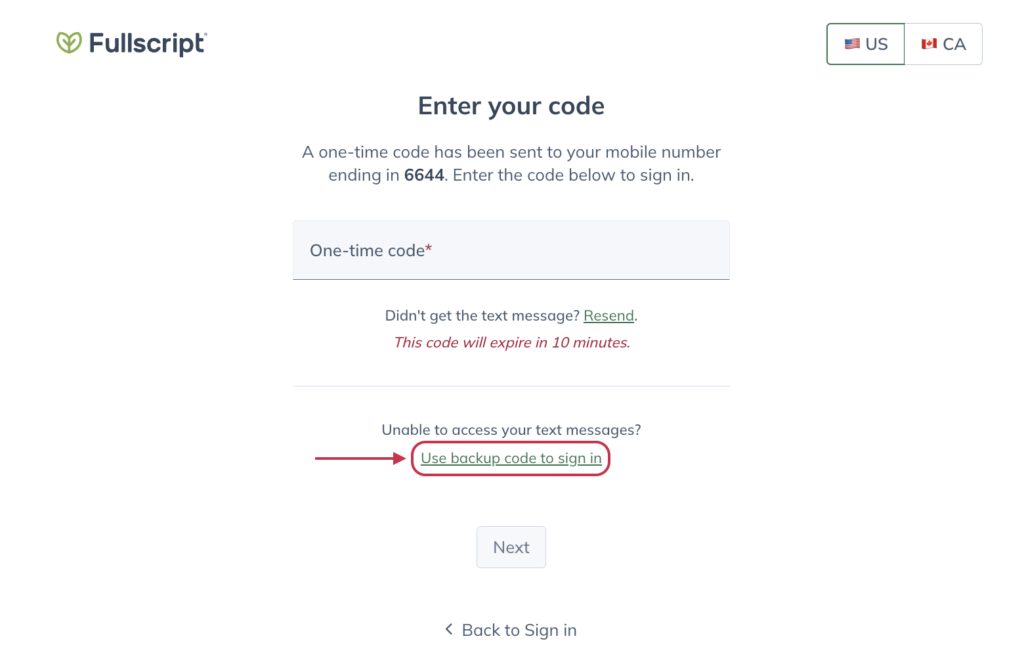
- Type in the backup code you were given when you set up multi-factor authentication.
- Click Next.
- You’ll be given a new backup code, as the previous one is now expired. Copy and securely store that backup code.
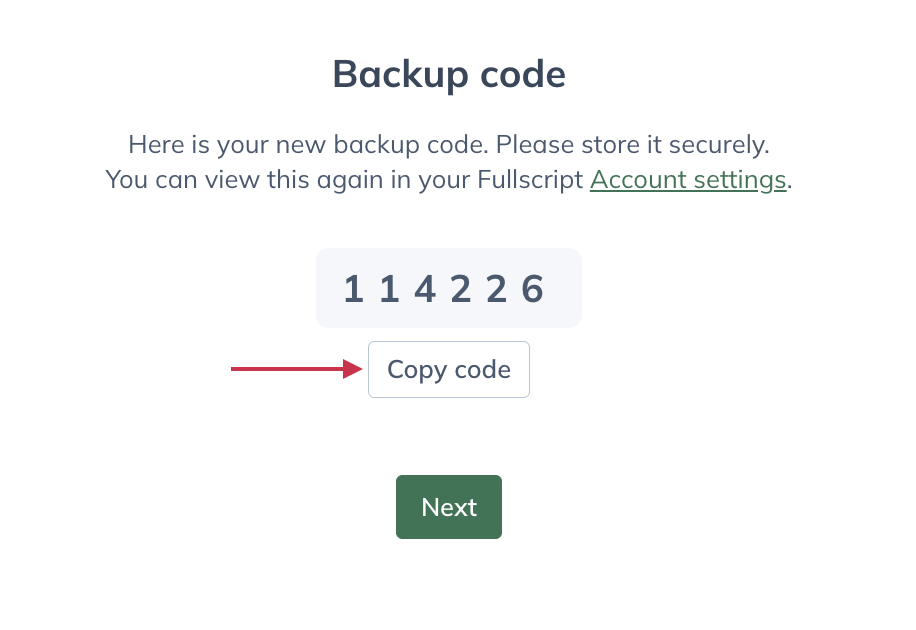
- Click Next to complete the login process.
Logging in without a code
With multi-factor authentication enabled, you’ll need a one-time code or a backup code to log in. If you can’t access either, contact our customer support team to recover your account.
Adding a trusted device
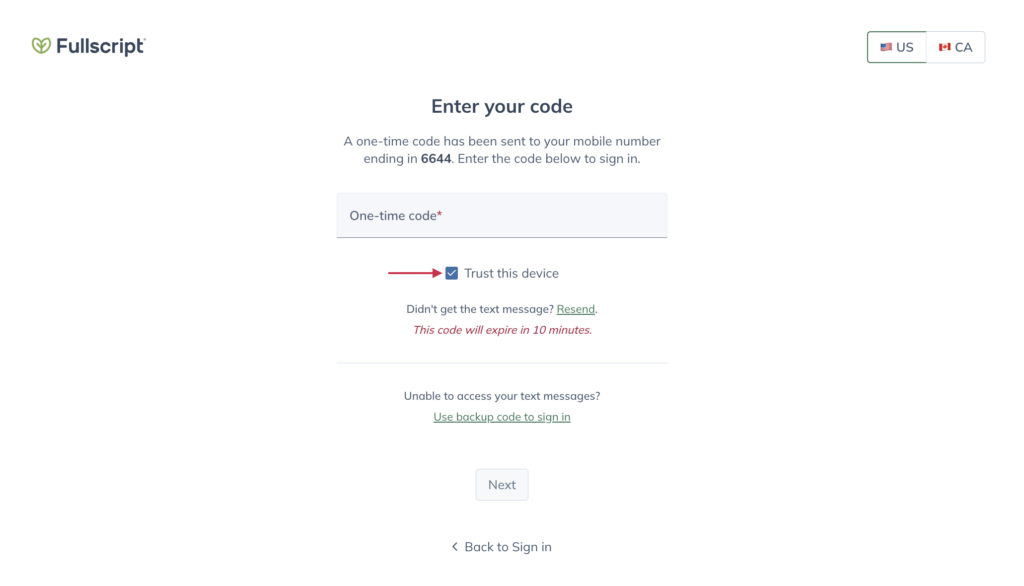
Once multi-factor authentication is set up, you can mark a device as trusted the next time you sign in. This lets you skip the extra authentication steps on future sign-ins.
To mark a device as trusted, click the Trust this device checkbox when you provide your one-time code. Then click Next to sign in and complete the set up process.
Changing your authentication method
You can change your authentication method from the Security tab of your account settings page at any time. To change your authentication method:
- Under the Manage heading in the navigation bar, click Settings.
- Click Account.

- Select the Security tab.
- Click Change under the Multi-factor authentication heading.

- You will be challenged based on the authentication method you selected previously.
- If you had originally selected SMS authentication, input the code from the text message you receive from us.
- If you chose the authenticator app option, input the code that’s available in the app.
- If you chose the email authentication option, use the code that we send to your email address.
- If you don’t have access to the authentication method you had previously set up, use your backup code.
- Choose the authentication method you’d like to change to.
- Click Next.

- Follow the on-screen steps to complete the setup.
- Save your new backup code.
- Click Done to complete the change.
