Last modified: February 13, 2025
Adding products to auto refills
Overview
You can add products and schedule an auto refill from the catalog, your plans, the Auto refills page in your account, or the shopping cart while placing an order.
Scheduling auto refills from the shopping cart
As products are added to your shopping cart, an auto refills menu will be displayed under each product. To add a product to an auto refill order in the iOS/Android app, select the Schedule auto refills menu and choose a shipping frequency. The auto refill order will be activated when the order is placed.

As you add products to your cart, on a desktop browser you’ll see a Schedule auto refill menu under each item. To set up auto refills, select the dropdown and choose a frequency. Your auto refills will be activated when the order is placed.
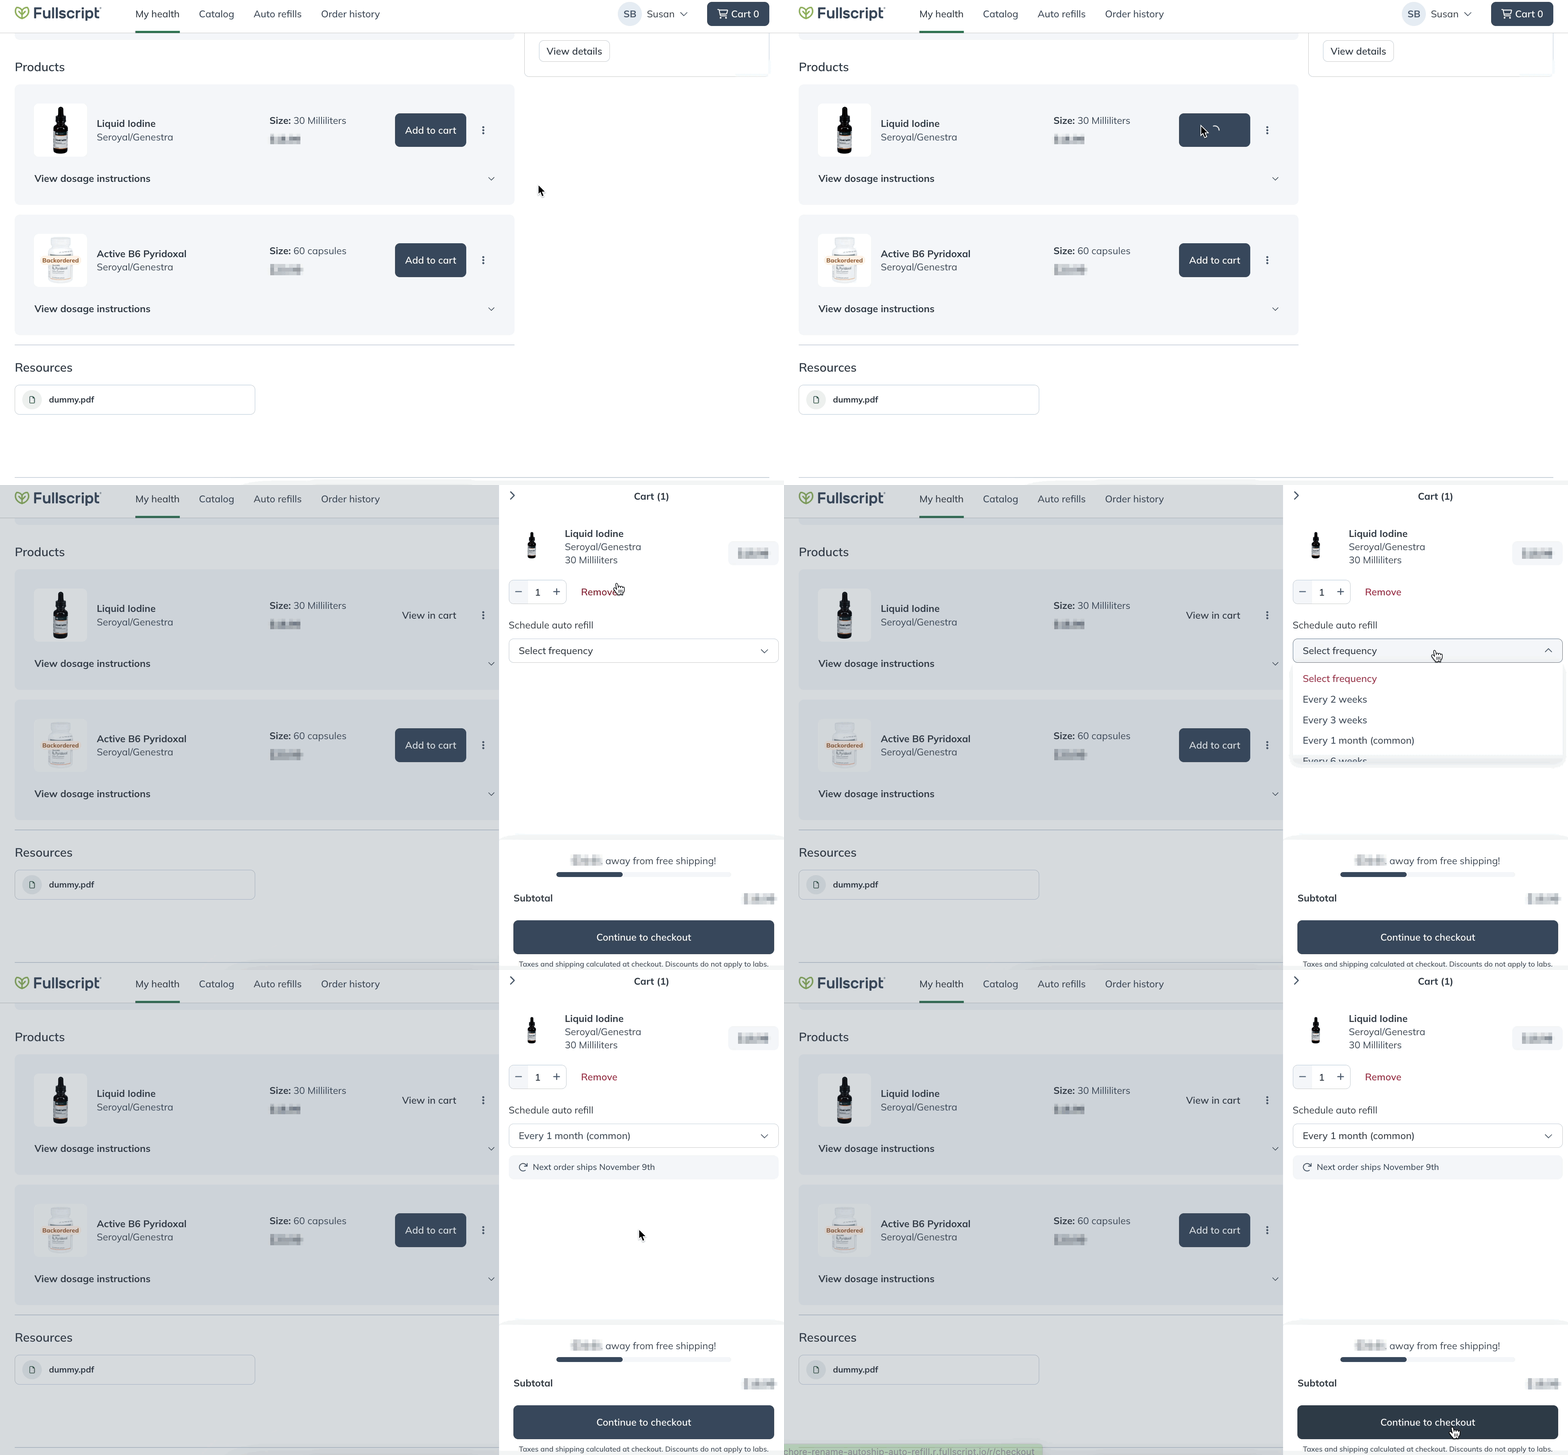
Selecting a frequency from the Autoship every menu.
As products are added to your shopping cart, in a mobile browser, a Schedule auto refill menu will be displayed under each product. To add a product to auto refills, tap the menu and choose a frequency. The auto refills will be activated when the order is placed.
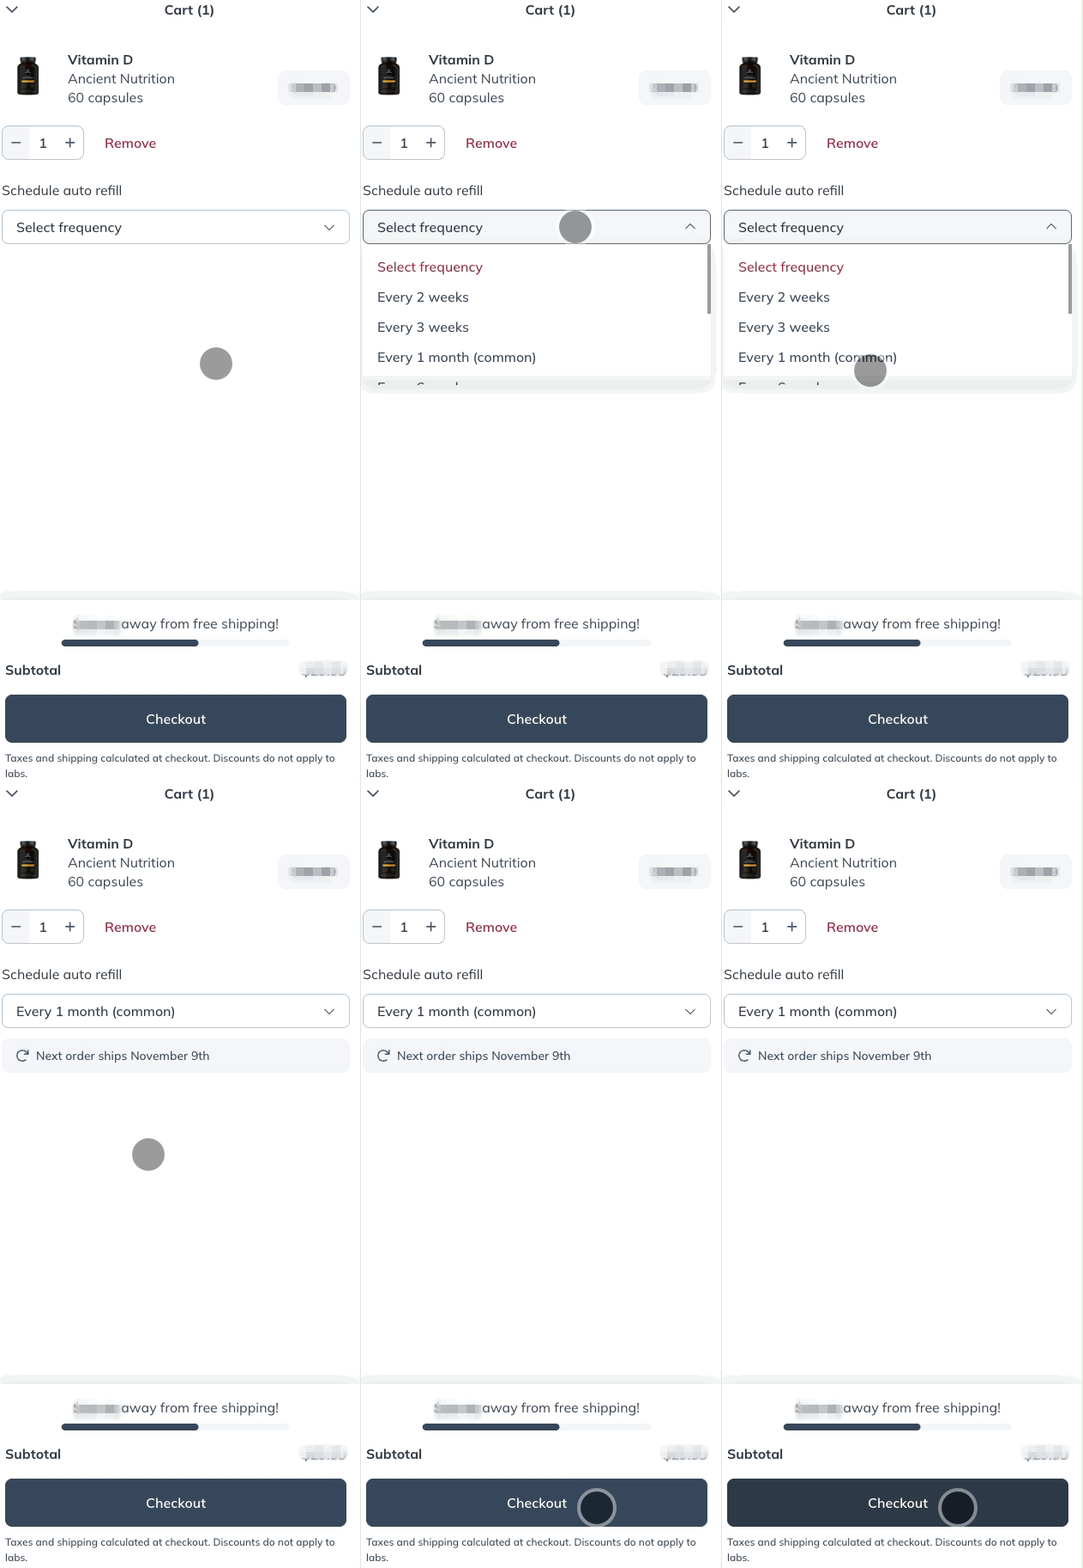
Selecting a frequency from the Schedule auto refill menu.
Scheduling auto refills from your plan or the catalog
In the iOS/Android app, you can add new products as auto refills from your plans or the catalog:
- Tap the product.
- Under purchase options, tap Auto refills.
- Adjust the number of units and shipping frequency.
- Tap Add to cart to create a new scheduled auto refill schedule while placing a new order, or tap Schedule for later to create an auto refill schedule without checking out.
You’ll need to set your shipping and billing information to successfully set up new auto refills. Head to the Orders page to manage existing auto refill schedules.
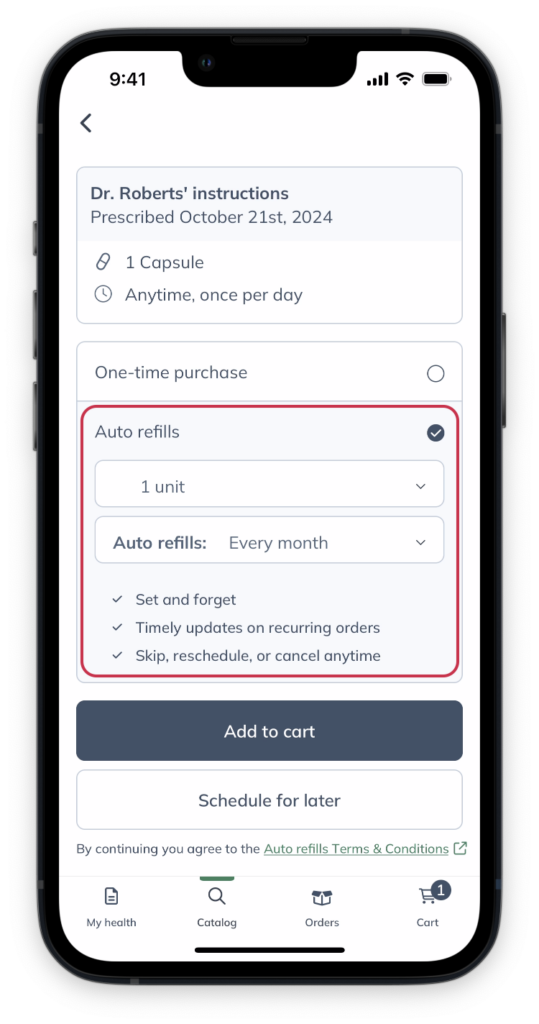
Setting up auto refills from a product card.
In a desktop browser, you can add new products to auto refills from your plans or the catalog by:
- Hovering your cursor over the product card.
- Clicking on the options menu ( )
- Then, select Schedule.
You’ll need to set your shipping and billing information to set up new auto refill schedules successfully. Head to the Auto refills page to manage existing auto refill schedules.
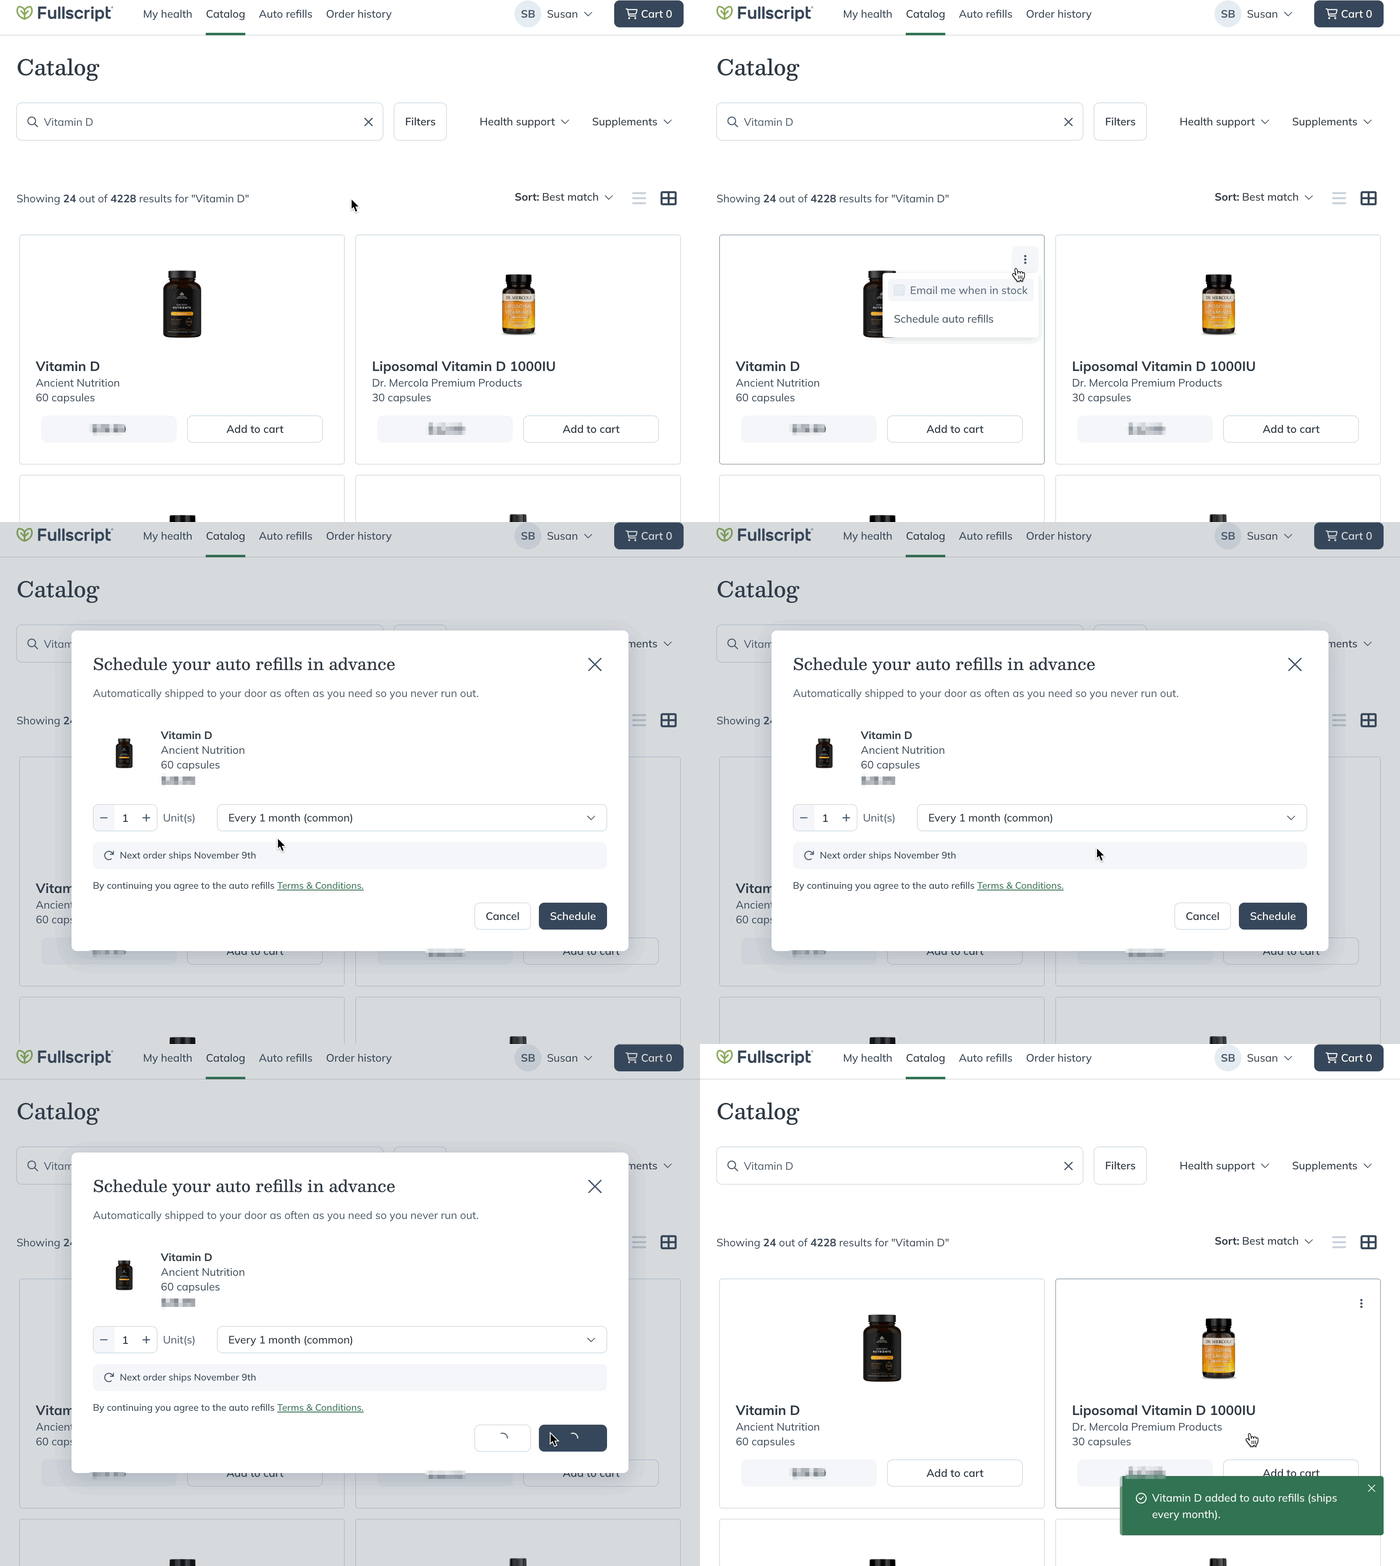
Setting up auto refills from the catalog.
In a mobile browser, you can add new products to auto refill from your plans or the catalog by:
- Tapping on the options menu ( ).
- Then, tapping Schedule auto refills.
You’ll need to set your shipping and billing information to set up new auto refill schedules successfully. Head to the Auto refills page to manage existing auto refill schedules.
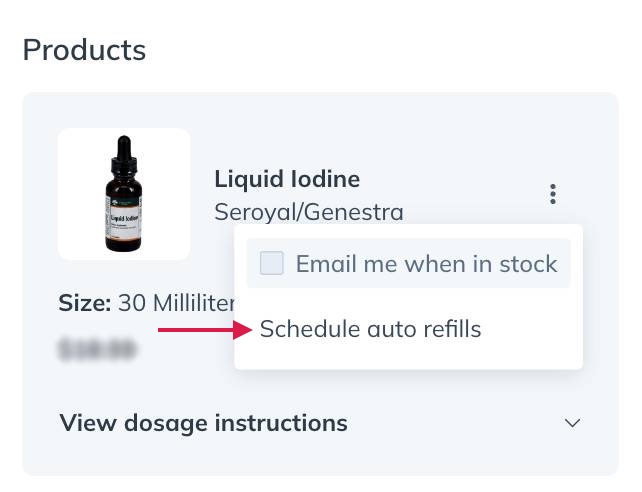
Setting up auto refill from a plan.
Previously ordered products
To schedule a past order on auto refills in the iOS/Android app, go to the Orders page and tap Refill. You can add the product to your shopping cart and set up your auto refills from there.
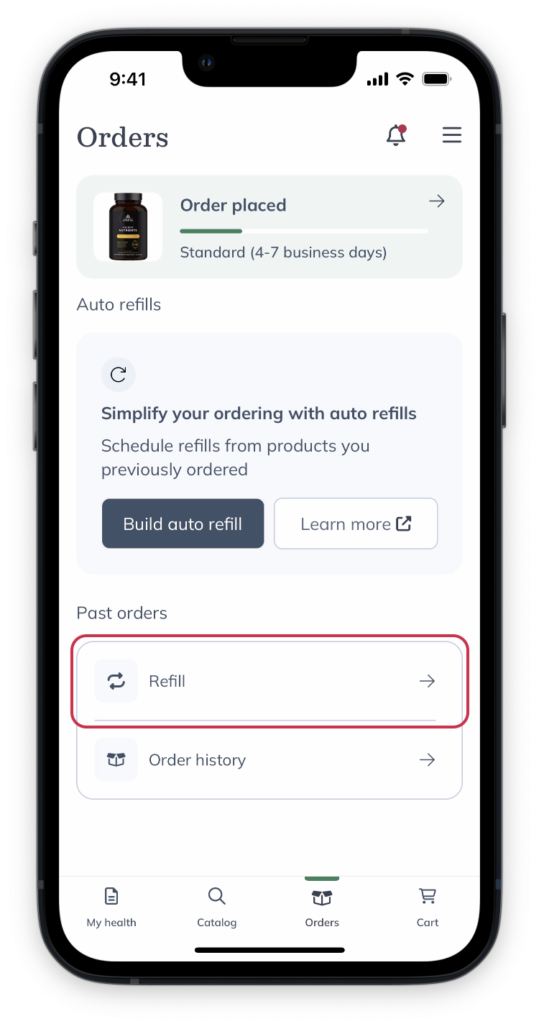
Tap Refill on the Orders page.
Adding an individual product to auto refills from order history
To auto refill individual products:
- Tap Order history on the Orders page.
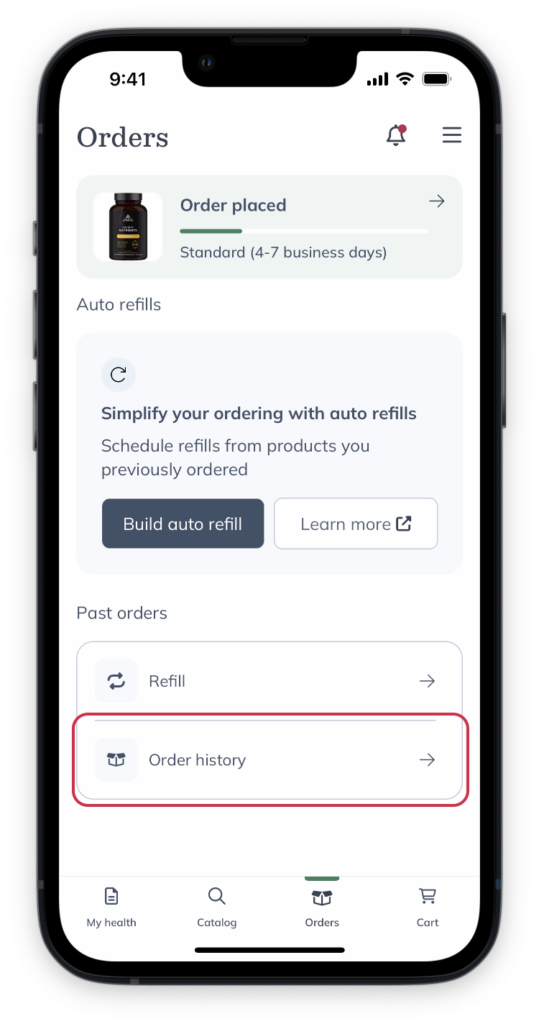
- Tap the order that contains the item.
- Tap the product on the order page.
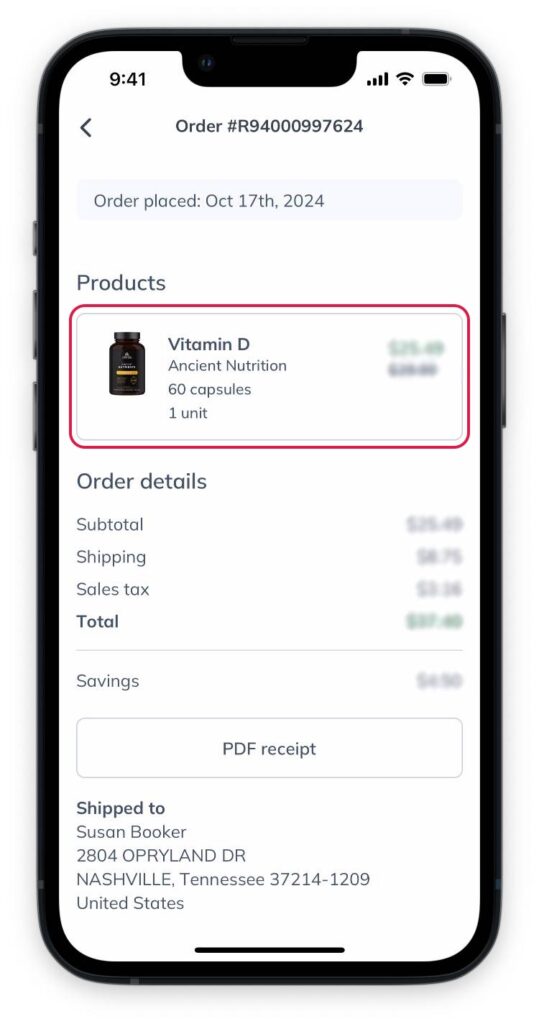
- Tap Auto refills.
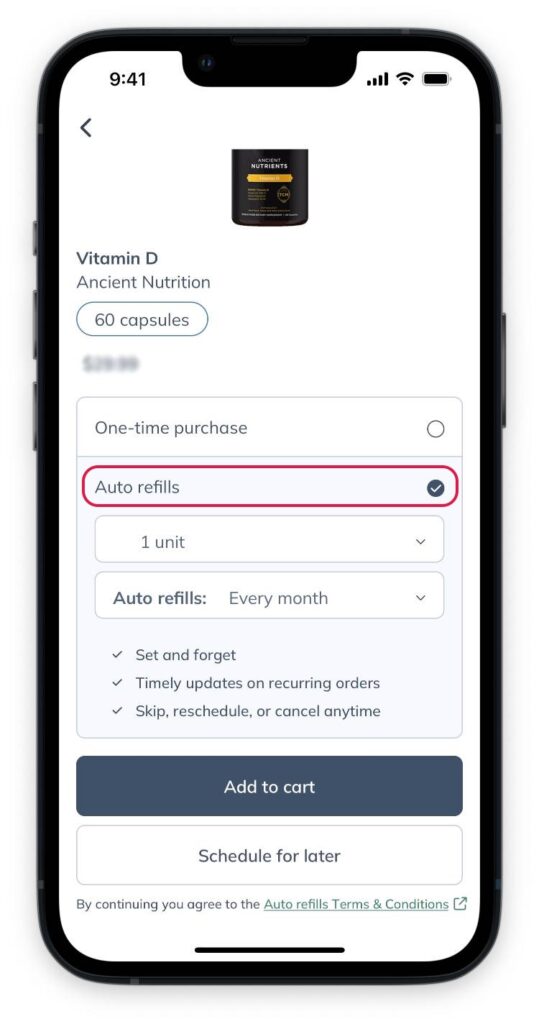
- Set up the number of units and the the shipping frequency.
- Tap Schedule for later. If you’d like to place an order now, tap Add to cart.
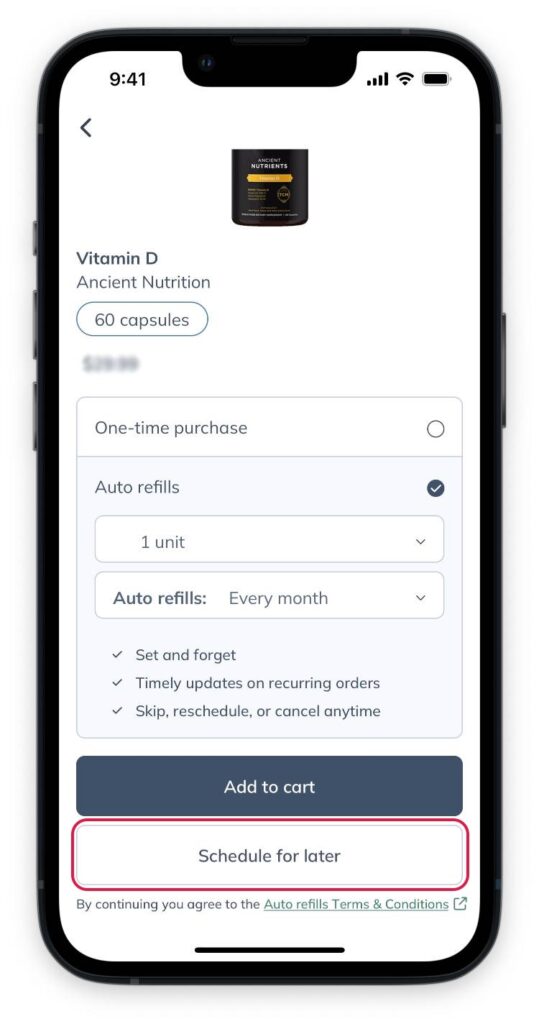
Previously ordered products can be added to auto refills from your Orders and Auto refills pages.
To schedule a past order for auto refills on a desktop browser:
- Go to the Orders page.
- Find the order you’d like to add a product from an click View details.

- Select the Add all to auto refills button. To auto refill individual products, select the Schedule auto refills button next to any product.
To schedule previously ordered products from the Auto refills page:
- Find a product under the Recommended products heading .
- Select Schedule auto refills.

Scheduling an auto refill for a product from the Auto refills page.
Previously ordered products can be added to auto refills from your Order history and Auto refills pages.
To schedule a past order for auto refills in a mobile browser:
- Go to the Orders page.
- Tap the order containing the product(s) that you’d like to schedule for auto refills.
- Tap the Add all to auto refills button at the top of the order to add all products to auto refills. To auto refill individual products, tap the Schedule auto refills button below any product.
To schedule previously ordered products to auto refill from the Auto refills page:
- Find a product under the Recommended products heading.
- Then, tap Schedule auto refills.
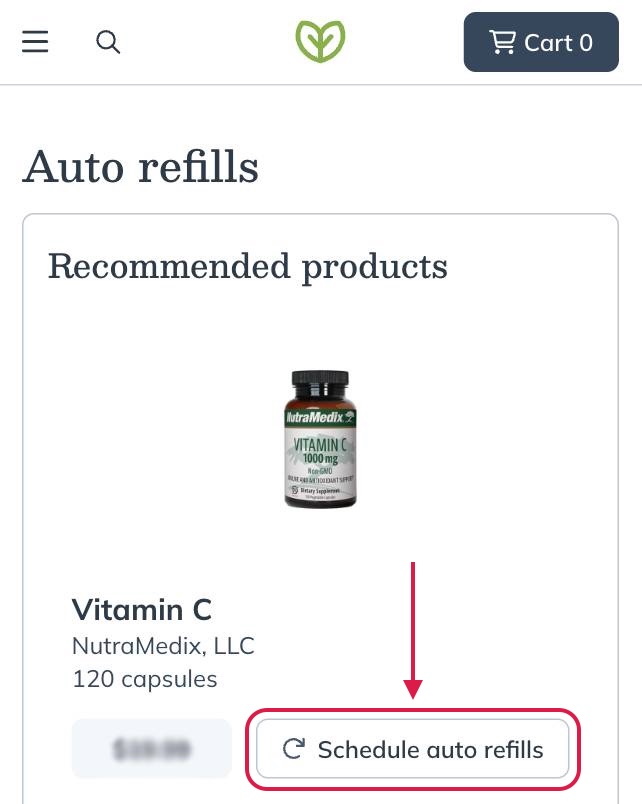
Setting a product to auto refill from the Auto refills page.
Adding a product to an existing auto refill schedule
You can add new products to existing auto refills at any time. It’s important to note that new products won’t be added to confirmed orders. As we prioritize filling orders as quickly as possible, we can’t cancel or change an order once it’s placed.
You can add new products to your scheduled auto refills from the catalog or your plans, the Auto refills page in your account, your order history, or the shopping cart while placing an order. The steps to do so are the same as those outlined above, just make sure you match the date and frequency on your existing auto refill.